Add recipients to signing package
Click Add recipient to add a recipient to the signing package. To add yourself as recipient to the signing package, click Add me.
Role
After adding a recipient, select the role for the recipient. A recipient
may act as a signer or a reviewer.

- Signer
Select this option if you would like the recipient to sign one or more documents in the signing package. Signers can be requested to enter information into text fields and select check boxes added to the documents.
- Reviewer
Select this option if you would like the recipient to review the documents in the signing package. A reviewer can open the documents for reading only.
Enter recipient’s name and email
- Enter the recipient’s name
and email address.
If an email address is provided, an invitation is sent when the signing package is started.

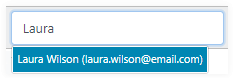
- Select a known contact.
Type into the field to create a list populated with contacts that match the entered text. Then select a contact from the list.
Delete recipient
A recipient can be deleted from the signing package using the delete
icon
![]() . Deleting a
signer also deletes the fields assigned to this signer from the documents in
the signing package.
. Deleting a
signer also deletes the fields assigned to this signer from the documents in
the signing package.
Advanced recipient settings
Clicking the settings icon
![]() opens the advanced
recipient settings for authentication, certificates, supplemental documents and
miscellaneous settings.
opens the advanced
recipient settings for authentication, certificates, supplemental documents and
miscellaneous settings.
Authentication
You can configure the package so that recipients must authenticate
before opening the signing package. This option limits access to the signing
package to authenticated persons only.
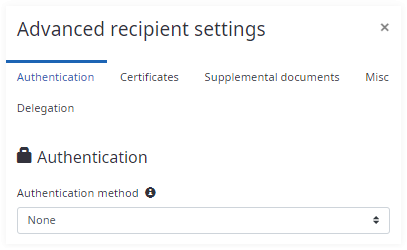
Authentication methods
- None (default)
Authentication is based only on email address
- Access Code
An access code is required to open the package. The access code field is prefilled with random characters and numbers that can be changed. The recipient must enter this access code to open the signing package.
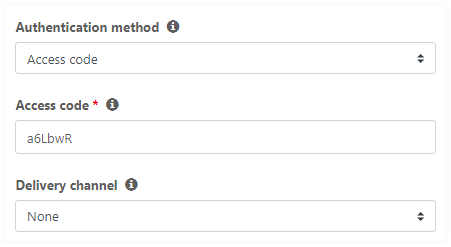
-
Delivery channel specifies the way the access code is delivered to the recipient.
None (default): The access code has to be delivered manually to the recipient.
SMS: Only available if configured for your account. The SMS delivery channel option requires the recipient’s phone number. SignDoc Standard sends an SMS with the access code to the phone number when the signing session is started.
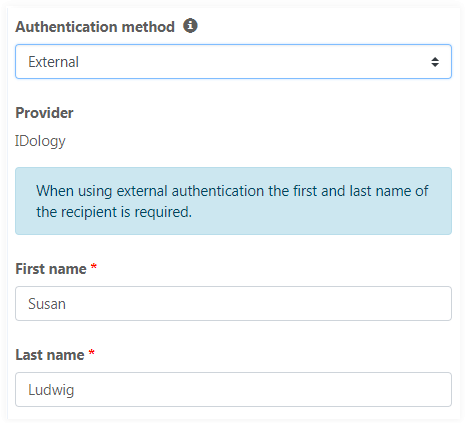
- External
authentication is based on an external authentication provider. This feature is
only available if configured for your account. When using external
authentication, the recipient’s first and last name is required.
Certificates
- Signer certificate
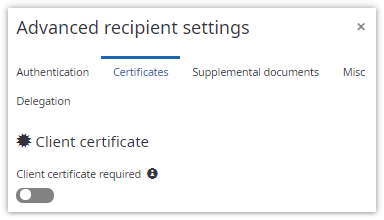
When Client certificate required is not selected, the installed certificate is used. See information about the signing certificate in Signing documents.
When Client certificate required is selected, an explicit signer certificate is necessary. To retrieve a signer certificate the SignDoc Device Support setup and a corresponding certificate plugin must be installed on the client computer.
- TSP signature
Here you can configure a TSP provider for the recipient. Depending on the TSP provider it is possible to provide a TSP signature for documents or for signature fields of the signing package. See TSP signature.
TSP signature is available only if Allow delegation is set ‘off’.Assigning documents to the recipient which require a TSP signature can be configured here. For assigning signature fields to the recipient which require a TSP signature see Prepare documents.
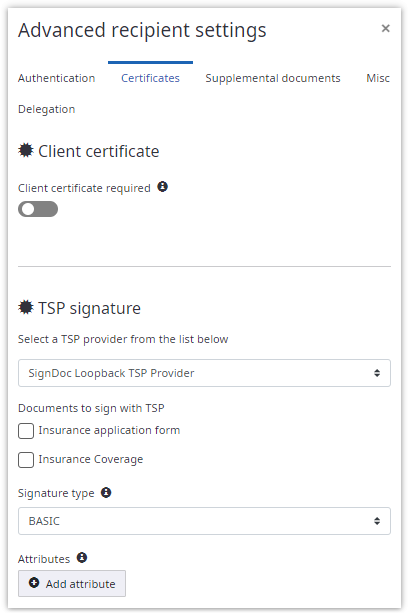
Perform the following steps for the TSP signature configuration:
- Select a TSP provider.
Select one of the TSP providers installed in the system from dropdown. Per default none TSP provider is selected.
- Assign documents.
Select one or more documents of the signing package which requires a TSP signature from the recipient. Note that this option is not visible when the selected TSP provider only supports signing a signature field with a TSP signature.
- Select the signature type.
Some TSP providers support different signature types for each recipient. If you are not sure if the selected TSP provider supports signature types just use the default one.
- Add attributes.
Some TSP providers require additional attributes of the recipient like a user id. When adding a new attribute you have to enter the name and the value of the attribute.
Please check the documentation of your TSP provider if additional attributes are required.
Supplemental documents
Use the
Supplemental documents tab to
configure documents required during signing sessions for the selected signer.
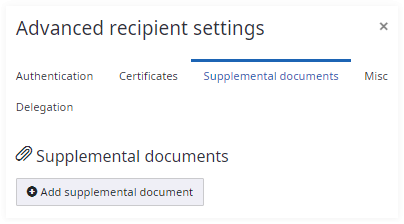
You can add, delete, or change supplemental document information. To add
a supplemental document, click
Add supplemental document.
The following form appears:
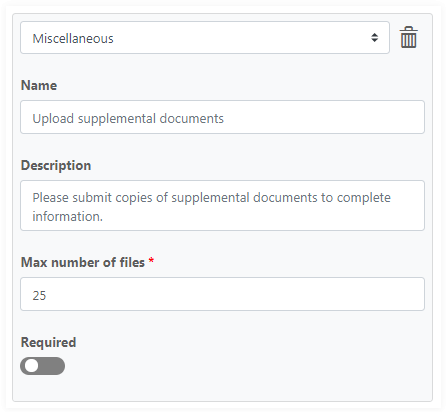
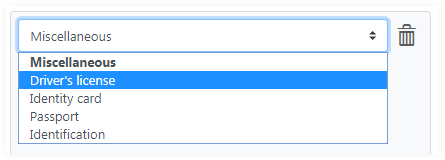
Select a document type from the list at the top of the form. The list
contains all document types even if they were defined for different languages.
Note that you can select supplemental documents configured in administration.
See "Documents and Packages" section in the
SignDoc Administrator’s Guide.
If you choose Miscellaneous you can change the name and description of the document in corresponding fields. To limit the maximum number of files attached, use the Max number of files field. All fields should be filled with values (notice that they are marked with red asterisks).
Name and Description fields are empty by default and a user can see the default values in the field placeholders. These default values can be configured in the administration section and depend on the current language of the Manage Client. If you do not change name and description, they will be displayed in the signer's language during the signing session.
If you want to "pin" the name and description, simply put appropriate values in the fields. In this case, both are required and they are not translated during the signing session.
Use Required to require a user to upload the supplemental documents during the signing session.
To remove a previously added supplemental document, use the Delete icon
![]() located to the
right of the document type list.
located to the
right of the document type list.
Each time you make changes in the Supplemental documents section, they are not saved automatically. Click Save in the package wizard to preserve the document changes.
Per-signer consent settings
Use the
Misc tab to configure consent
requirements for a specific signer or all signers in the package.
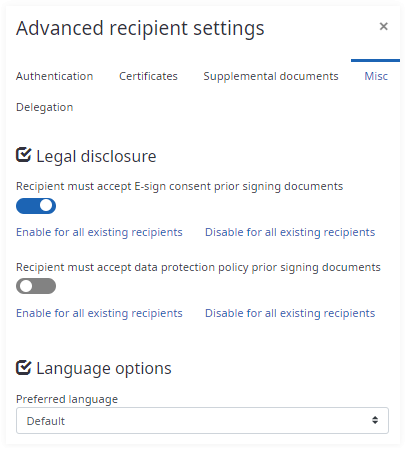
You can update (enable or disable) the E-sign consent and data protection policy consent setting for the selected signer. You can also use the action links Enable for all existing recipients or Disable for all existing recipients to enable or disable the requirement for all currently existing recipients defined in the package. If you do not update these settings, the application requires consent according to the configured settings. Please note that after adding new recipients to the package the action links must be triggered again.
Language options
When you add recipients to a signing package, a default preferred language is configured for the account. The preferred language of a recipient affects the content language for emails sent to recipients. The selection also affects the user interface language during the signing session.
- When using Default as the preferred recipient language, the user interface language during the signing session is based on the language setting for the recipient's browser.
- When using an explicit recipient language, it is applied to the user interface during the signing session.
In both cases, English is the default language.
Delegation
In the
Delegation tab you can select
if a recipient is allowed to delegate its signing session to another person.
Delegating a signing session is not possible in case a TSP signature is
required for the recipient or the recipient uses two-factor authentication.
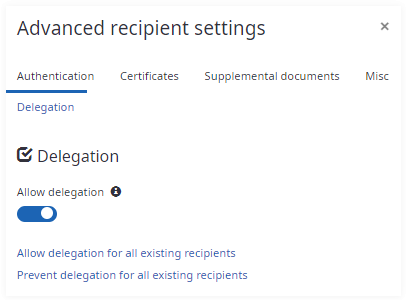
You can also use the action links Allow delegation for all existing recipients or Prevent delegation for all existing recipients to enable or disable the requirement for all currently existing recipients defined in the package. Please note that after adding new recipients to the package the action links must be triggered again.
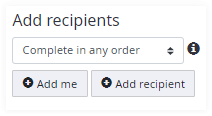
Routing order
The routing order sets the order in which recipients receive and can work on the documents. Select one of the following routing order options:
- Parallel signing (default)
Invitations are sent to all recipients at the same time based on the send date.
To use parallel signing, the Complete in any order setting must be selected.

- Series signing
Each recipient is invited (via email) in sequential order. The next recipient is invited only after the previous recipient is finished. Use the up/down arrows to reorder the recipients.

To use series signing, the Complete one by one setting must be selected.
- Custom signing
For more flexibility, recipients can also be assigned to stages. All recipients of a stage are invited (via email) at the same time. Recipients of a next stage are invited when all recipients of the previous stage are finished. Use the up/down arrows to assign the recipients to stages.
To use custom signing, the Complete in custom order setting must be selected.

Custom signing example
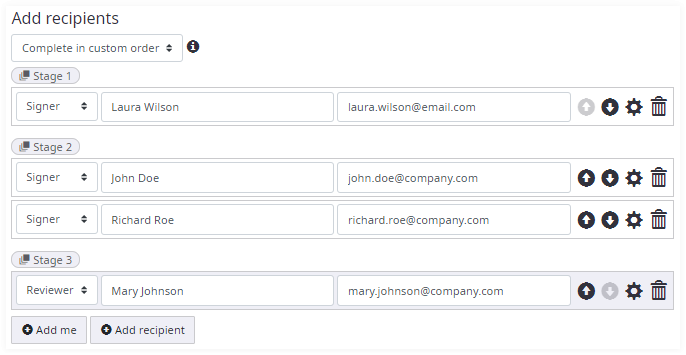
In this example the signer of stage 1 is invited first to sign. Once the signer in stage 1 has finished, the signers of stage 2 are invited to sign. After the signers in stage 2 finished, the reviewer in stage 3 is invited to review.
Optional recipients in custom signing
Custom signing also provides the possibility to configure optional recipients for a stage.
- Optional reviewers can be achieved by configuring a stage which contains only reviewers. Once the first reviewer reviews the signing package the stage is complete. All other reviewers of the stage are skipped.
- Optional signers can be achieved by configuring a stage with multiple signers and assigning fields to that stage. How to assign fields to a stage is explained in Prepare documents section.